| How do you apply mehndi? |
Sample Designs Page | How to make a mehndi cone | Purchasing mehndi cones
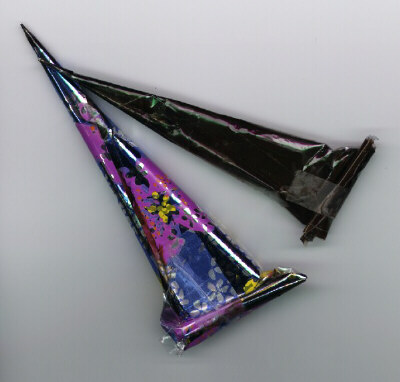
My personal favorite tool is a cone made of rolled plastic, similar to a cake decorating tube, with a tiny hole at the end. The benefit of such an application tool is that you can achieve incredibly fine lines, and getting used to a cone is much easier than using Jacquard-brand bottles, which may tire your hands. Usually, one cone can be used to decorate up to ten less-elaborately designed hands; for very detailed work a cone will cover two hands. Using a mehndi cone is quite simple, though it takes getting used to. A cone can be held in several different ways - like a cake-decorating tube, or like a pencil. I prefer holding cones using a pencil-holding technique because it allows me optimal control over line creation. In my method, I place the cone in my hand between my thumb and forefinger and curl my remaining fingers in for support. my thumb is facing straight in a line at 180 degree angle to my arm, while the forefinger is perpendicular to it. This may sound complicated, but it is fairly intuitive - just try holding the cone like you would a pencil, apply more pressure as you are applying and modify the cone so you can allow henna paste to come out of it. Mehndi also comes ready-made in tubes; these containers provide an easy method method of mehndi application, but often henna in these forms will lack a smooth consistency, and most professional artists avoid ready-made pastes because it is impossible to discern ingredients added. In the past, mehndi was applied by making a henna paste without filtering powder. Instead, the fibrous quality of ground henna leaves came to an artist's advantage. Mehndiwalas would roll thick henna fibers from their paste on a flat surface, and then lift the paste with a knife to place designs on the hand. This method of application made the designs much less elaborate than they are today. The cone method, which has been adopted in more recent times, employs much more of a drawing technique than the antiquated rolling and lifting method. A third simpler but more wasteful method of applying
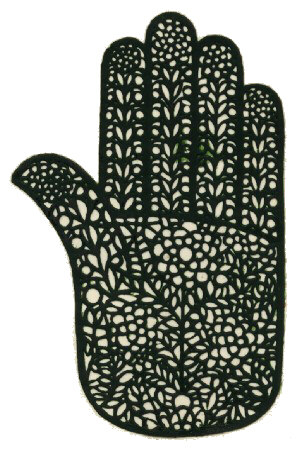
mehndi is to put a stencil that is hand-shaped (see image) over your hand and spreading
the henna paste over the entire stencil. Although this method If you are interested in other types of mehndi application, I have read about people applying mehndi by using syringes, paintbrushes, bottles with tips attached, or cake decorator's cones. I am sure that these methods can all work, but I like to stick to my little flexible plastic cone. Call me a stickler for tradition! In her mehndi book, Loretta Roome recommends Jacquard bottles, plastic bottles that come with fine metal tips in various widths. These bottles are supposedly very hard to find but, when full, work quite well and provide a very consistent line. Indispensable extra tools in mehndi application include fine needles and toothpicks, which can be essential in fixing lines or lifting and moving a line, or picking up stray mehndi, and thin sewing pins that are useful to unclog the hole in your mehndi cone. You can practice mehndi on many surfaces, but it is always essential to practice on the skin itself. By using this three-dimensional canvas, you understand the structure of the skin and how designs that look nice on paper may not look so nice on the body. In making designs, I like to look at various
different types of designs at first, and then develop my own patterns from simple
motifs. If you purchase a mehndi design book anywhere, you will most likely find
that it has tons of patterns, leaf designs, etc. which you can take and turn into your own
ideas. If you want to play it safe or if you question your creativity, start out
practicing mehndi by copying designs, then get creative! A good thing to do is
practice your new designs by first drawing them, and then going over them with the
mehndi. For more information, check out my Sample Designs!
How to make a mehndi cone
|